expert-octo-system
expert octo system
A specialized digital academic paper reader for students with ADHD Aims to keep students on task and format text for better readability
Links
Prerequisites
Please ensure the following software / packages are available in your development environment.
DockerPython(version 3.13)node.js(version 23.5.0)
The application uses various cloud providers
CloudFlareaccount (Free plan)Firebaseaccount (Free plan)
Optional
-
uv(The application uses it for package management. Alternatively, arequirements.txtfile is available to install dependencies with thepipcommand.) -
Azure Cloudaccount (Used for creating aSQLdatabase to store user details during authentication, Free tier) -
CloudAMQPaccount (For a cloudRabbitMQinstance, Free plan)
Note: The application is developed with a M1 Macbook. As such, there might be slight discrepencies in commands used when building on other systems.
Running the application
Instructions will be divided into 2 sections - backend and frontend. Please use separate terminal windows for each section.
Backend
- Ensure terminal is at the
expert-octo-backenddirectory
cd expert-octo-backend`
- Install dependencies
It is recommended to install the libraries after creating and activating a virtual environment. To follow along, please ensure that
uvis installed.
uv sync
uv pip install docling --extra-index-url https://download.pytorch.org/whl/cpu
uv pip install spacy-layout
uv run -- spacy download en_core_web_trf
uv run -m nltk.downloader punkt_tab
- Fill in environment variables
- Rename
.env.exampleto.env
RABBITMQ
To run the app locally, there are 2 ways to get a rabbitmq instance.
Docker method
Run the following docker command:
docker run -d -p 5672:5672 rabbitmq
In the .env file:
RABBITMQ=”pyamqp://guest@localhost//”
CloudAMQP method
- Create an account / sign in to CloudAMQP
- Click on
Create New Instancebutton - In the dropdown, select the `Little Lemur (Free) plan
- Complete filling in the rest of the details to create a new
RabbitMQinstance. - After the instance is created, visit the instance’s page
- The URL required is found under the
AMQP detailssection - Copy the URL and filled it in the
.envfile’sRABBITMQfield
R2
- Create an account / sign in to CloudFlare
- At the top right hand corner, click on the
Addbutton - Select
R2 Storage bucketand fill in the required details - Ensure that 3 different buckets are created (repeat steps 2 to 3)
- At the
.envfile, fill in the last 3R2fields with the names of the 3 newly created bucket - At the
R2 Storage bucketpage, please find theAccount Detailssection and click on theManagebutton - The information provided in this page will be sufficient to fill in the first 3
R2fields of the.envfile (Please note that anAccount API tokenneeds to be created to obtain the secret access key value)
The application might encounter errors due to the CORS. Please ensure that the urls of the backend and frontend are ‘allowed’ in the
CORS PolicyofR2 Storage Bucketsettings page
SERVICE_ACCOUNT
- Create a new
Firestoreproject - Create a
Firestore Database, the database should be named:papers(Other names can be used. However, it requires a code change in theshared/firestore.pyfile) - Create a web app and fill in the require information
- After the web app is created successfully, a service account
.jsonfile will be provided. Please download this file and saved it in a secured location - Copy the contents of the
.jsonfile intoSERVICE_ACCOUNTfield of the.envfile (put ‘’ around the content)
- Start up
Celery
uv run celery -A tasks worker --pool=solo --loglevel=info
- Start up
FastAPIserver In a separate terminal window, run the following:
cd app
uv run fastapi dev main.py`
Frontend
- Ensure terminal is at the
expert-octo-frontenddirectory
cd expert-octo-frontend`
- Install dependencies
npm i
- Fill in environment variables
- Rename
.env.exampleto.env
BETTER_AUTH_SECRET
Generate a secret key by visiting the better-auth documentation page
In the .env file:
BETTER_AUTH_SECRET=[generated secret key]
GOOGLE_CLIENT_ID and GOOGLE_CLIENT_SECRET
Follow the guide provided by better-auth to obtain and setup Google Credential authentication
AZURE_SQL values
Follow the guide provided by Azure to spin up an Azure SQL database and fill in the fields required in the .env file
- Start up
next.jsdevelopment servernpm run dev - Visit the web app in browser
The web app will be served at http://localhost:3000
Paper Prototypes
Overall Reader View Page
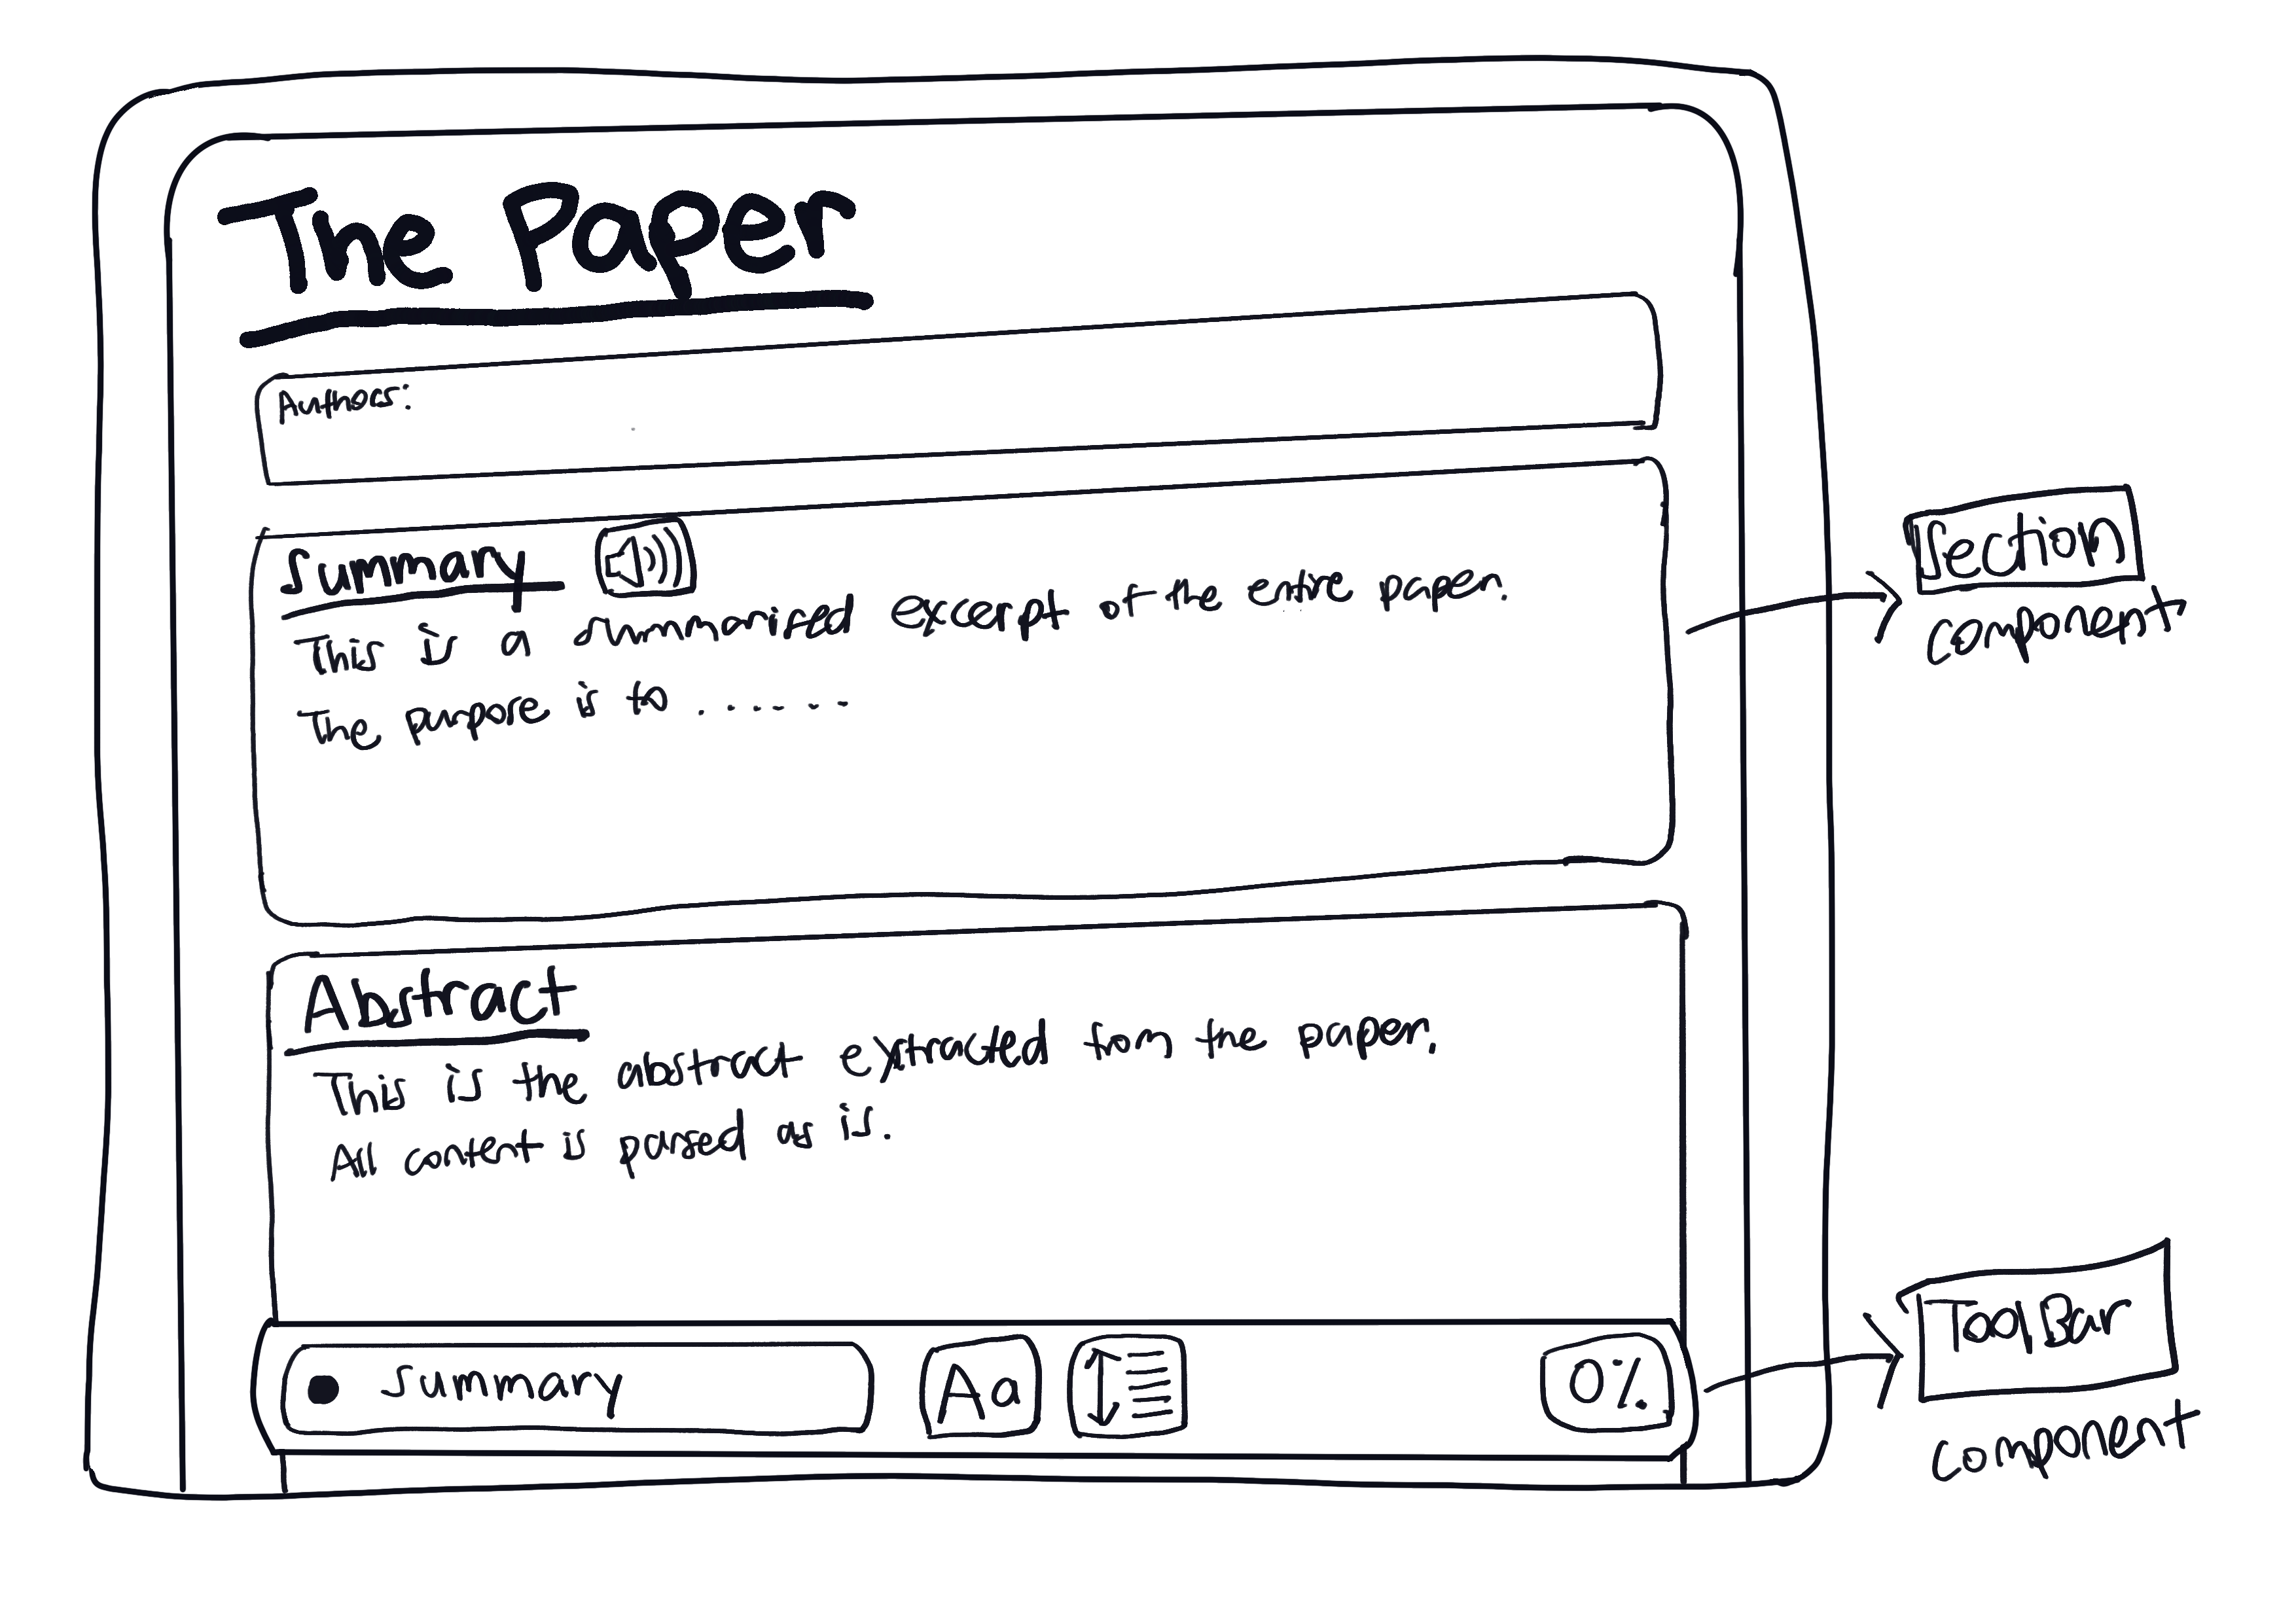
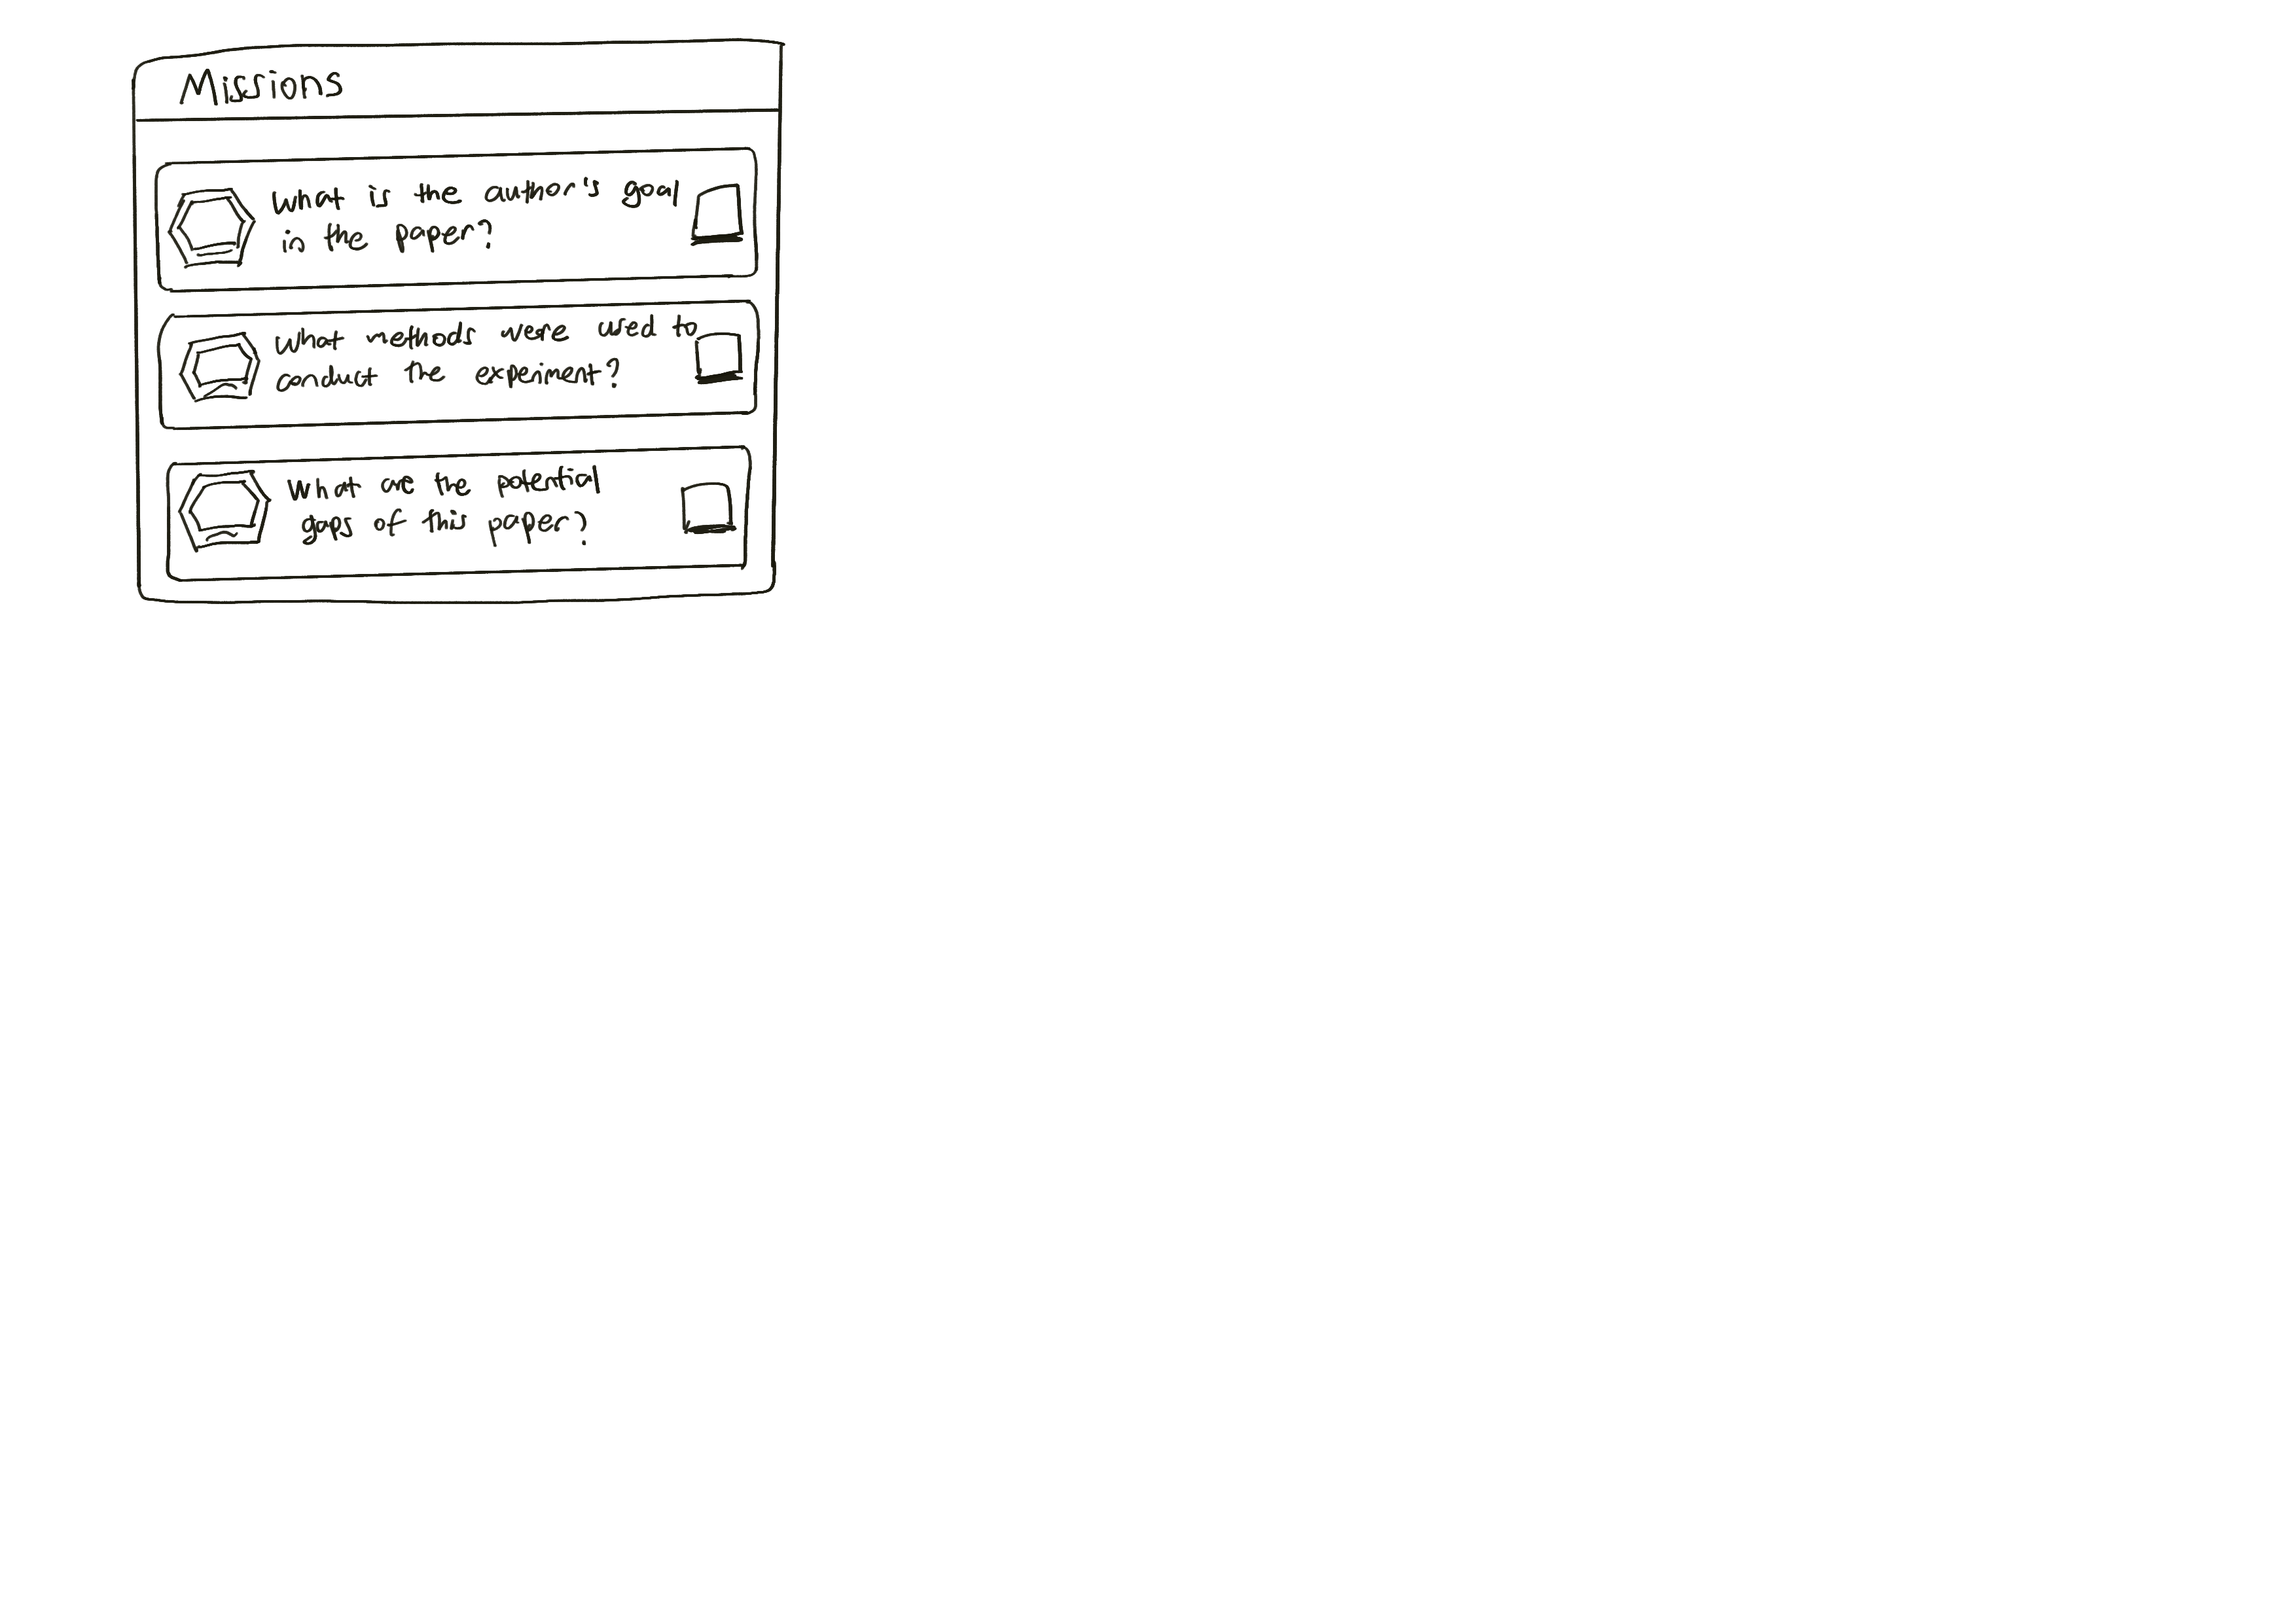
ToolBar Component in the Reader View Page

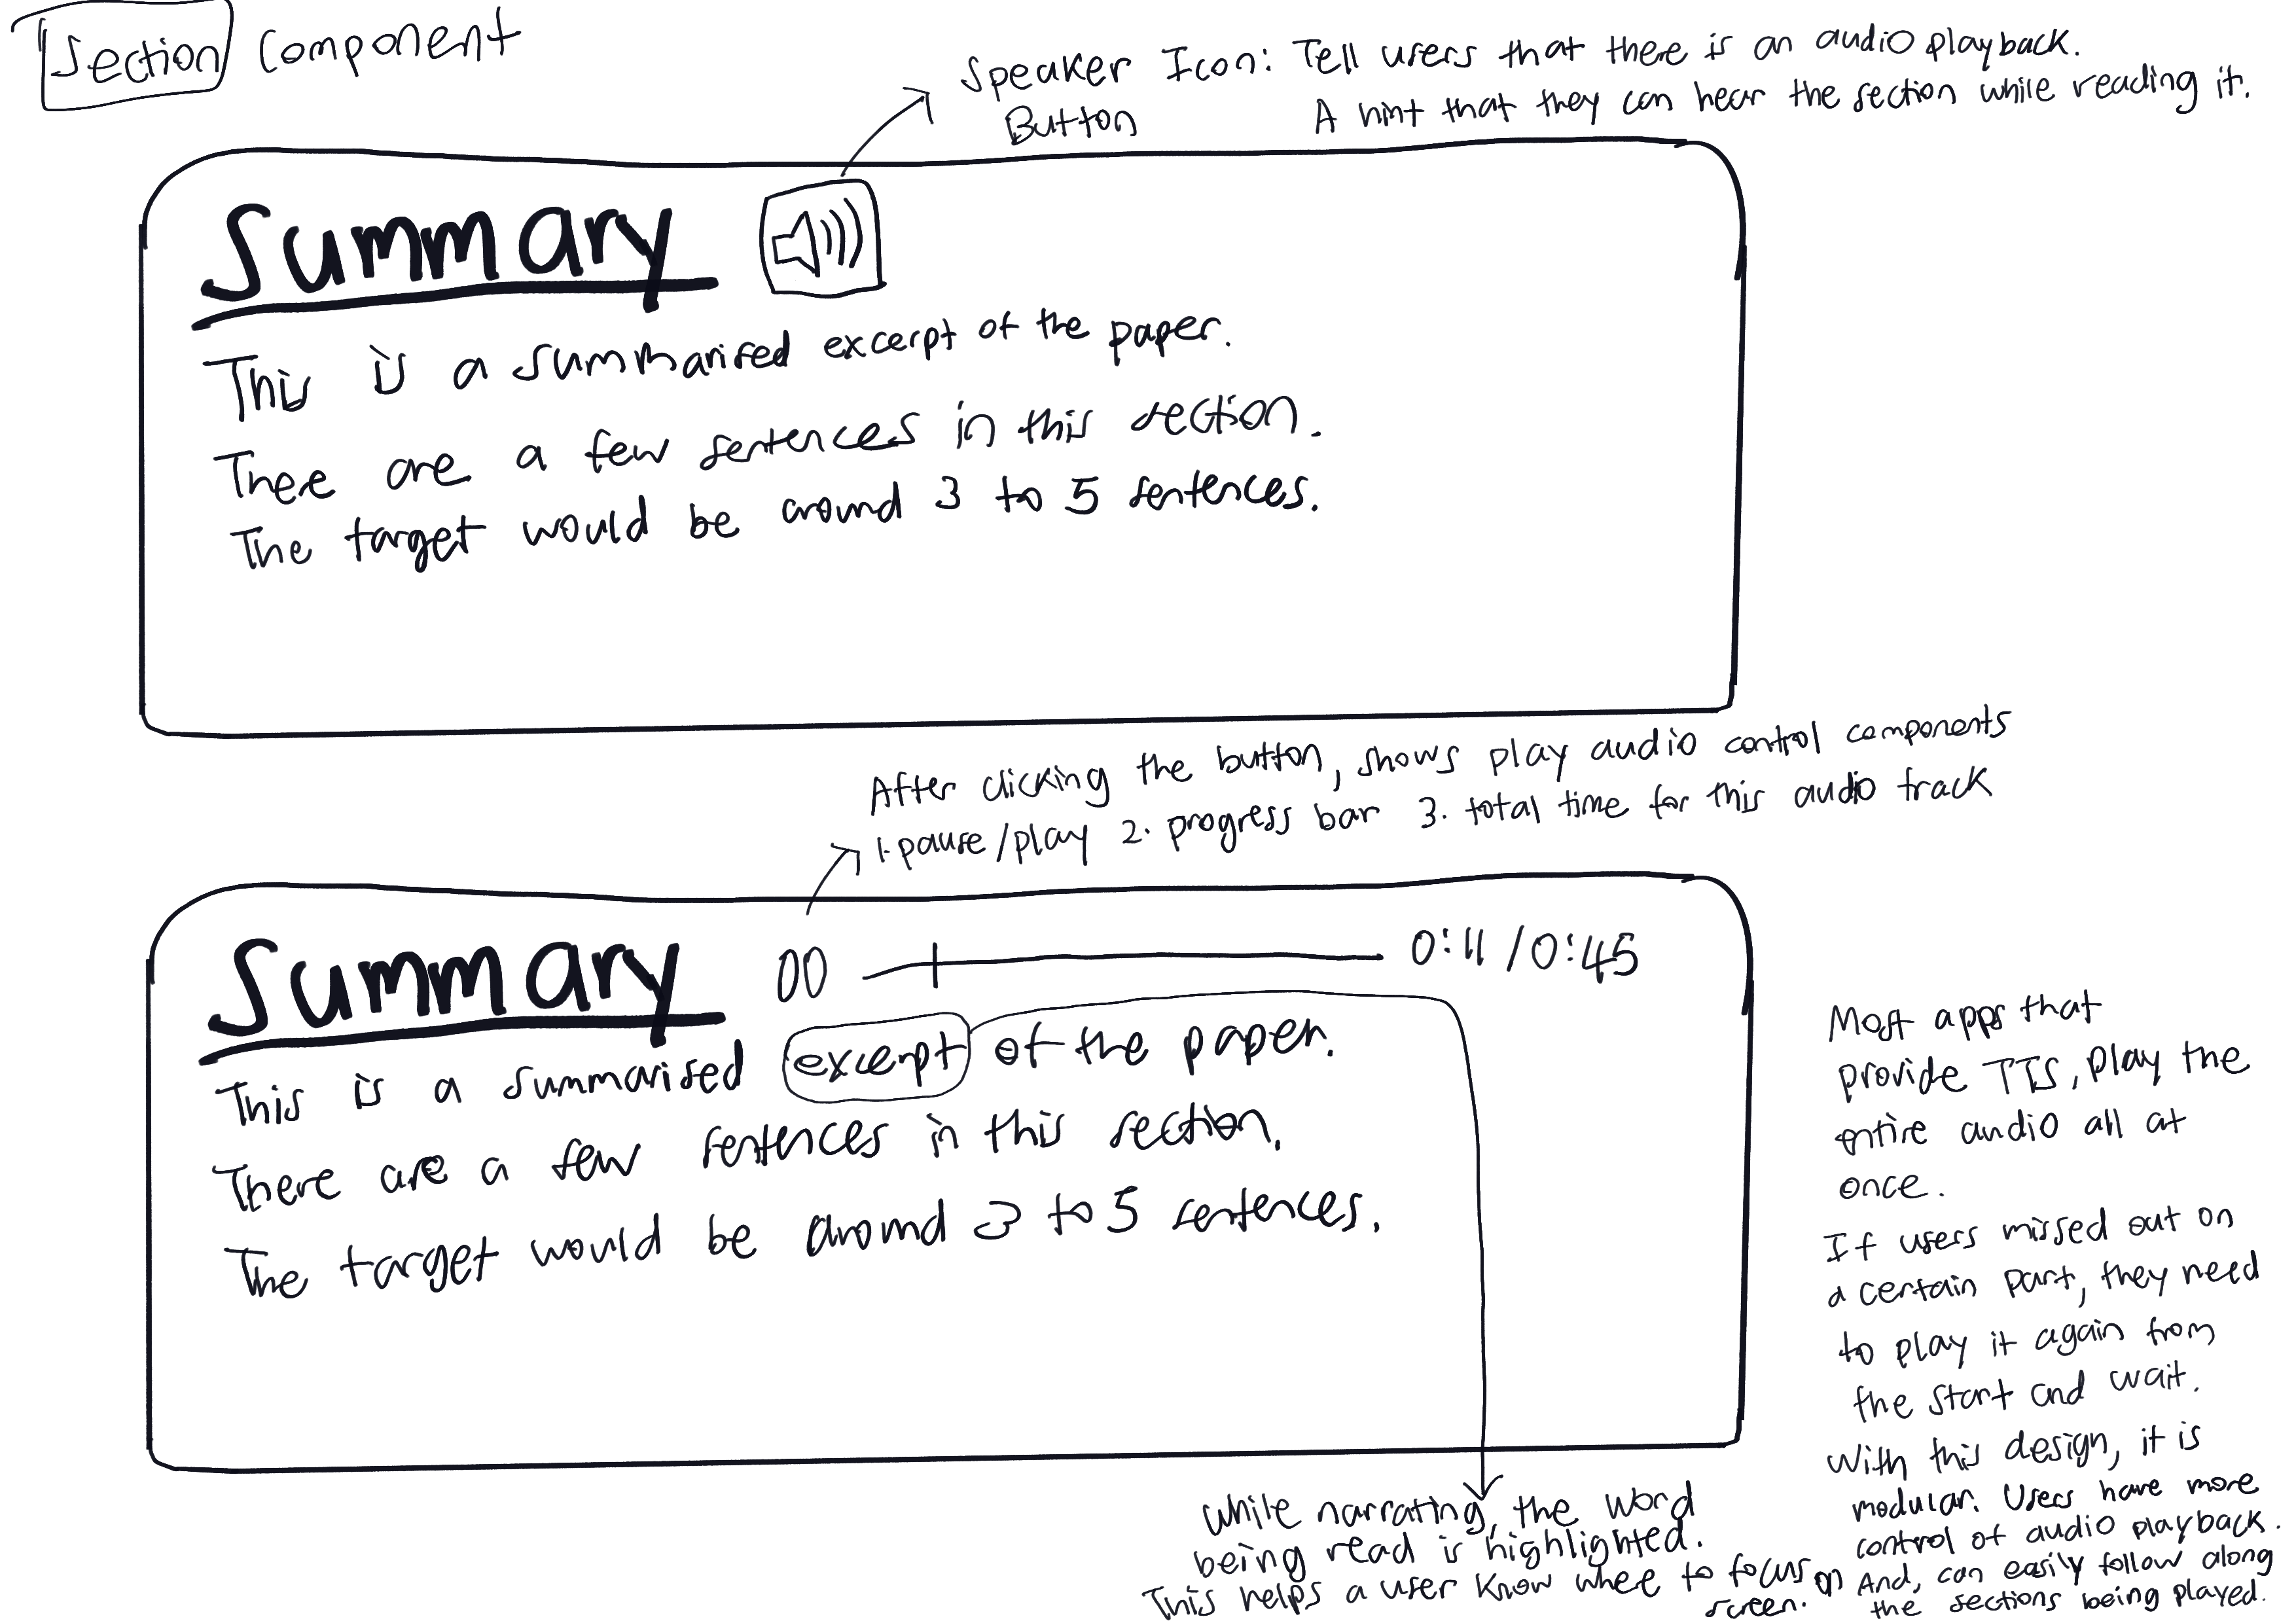
Section Component in the Reader View Page
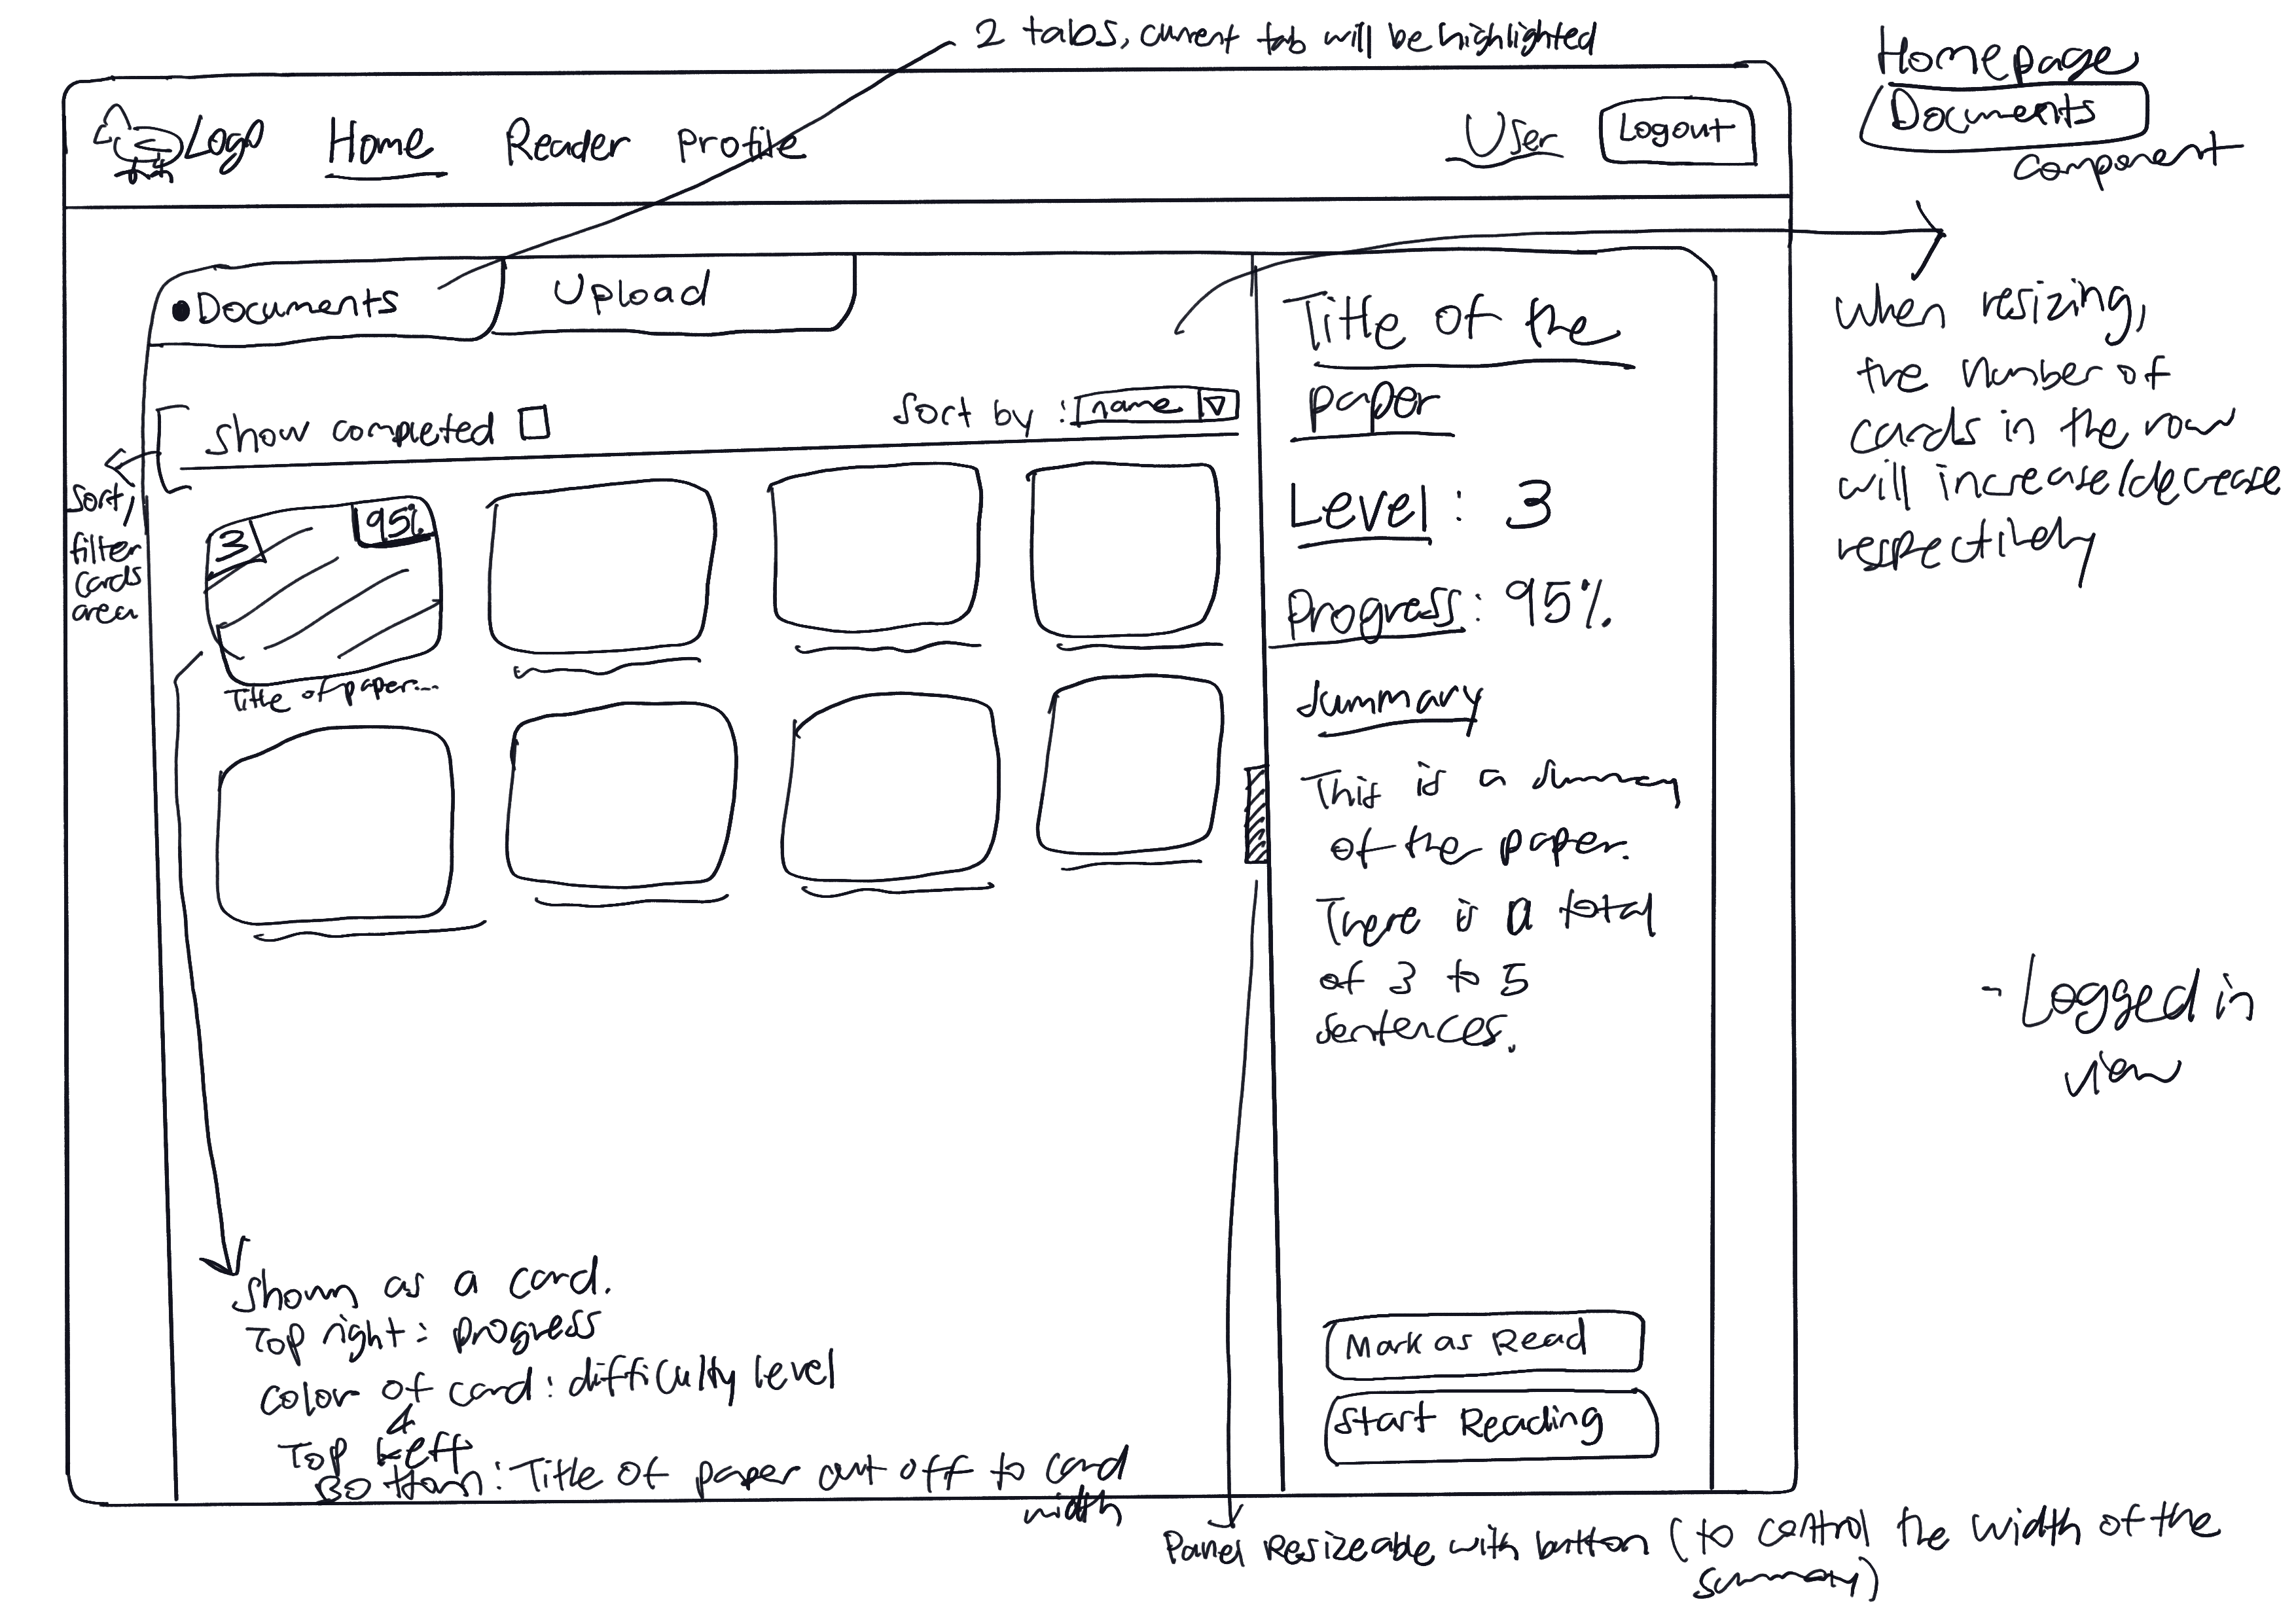
Documents tab in the Home View Page
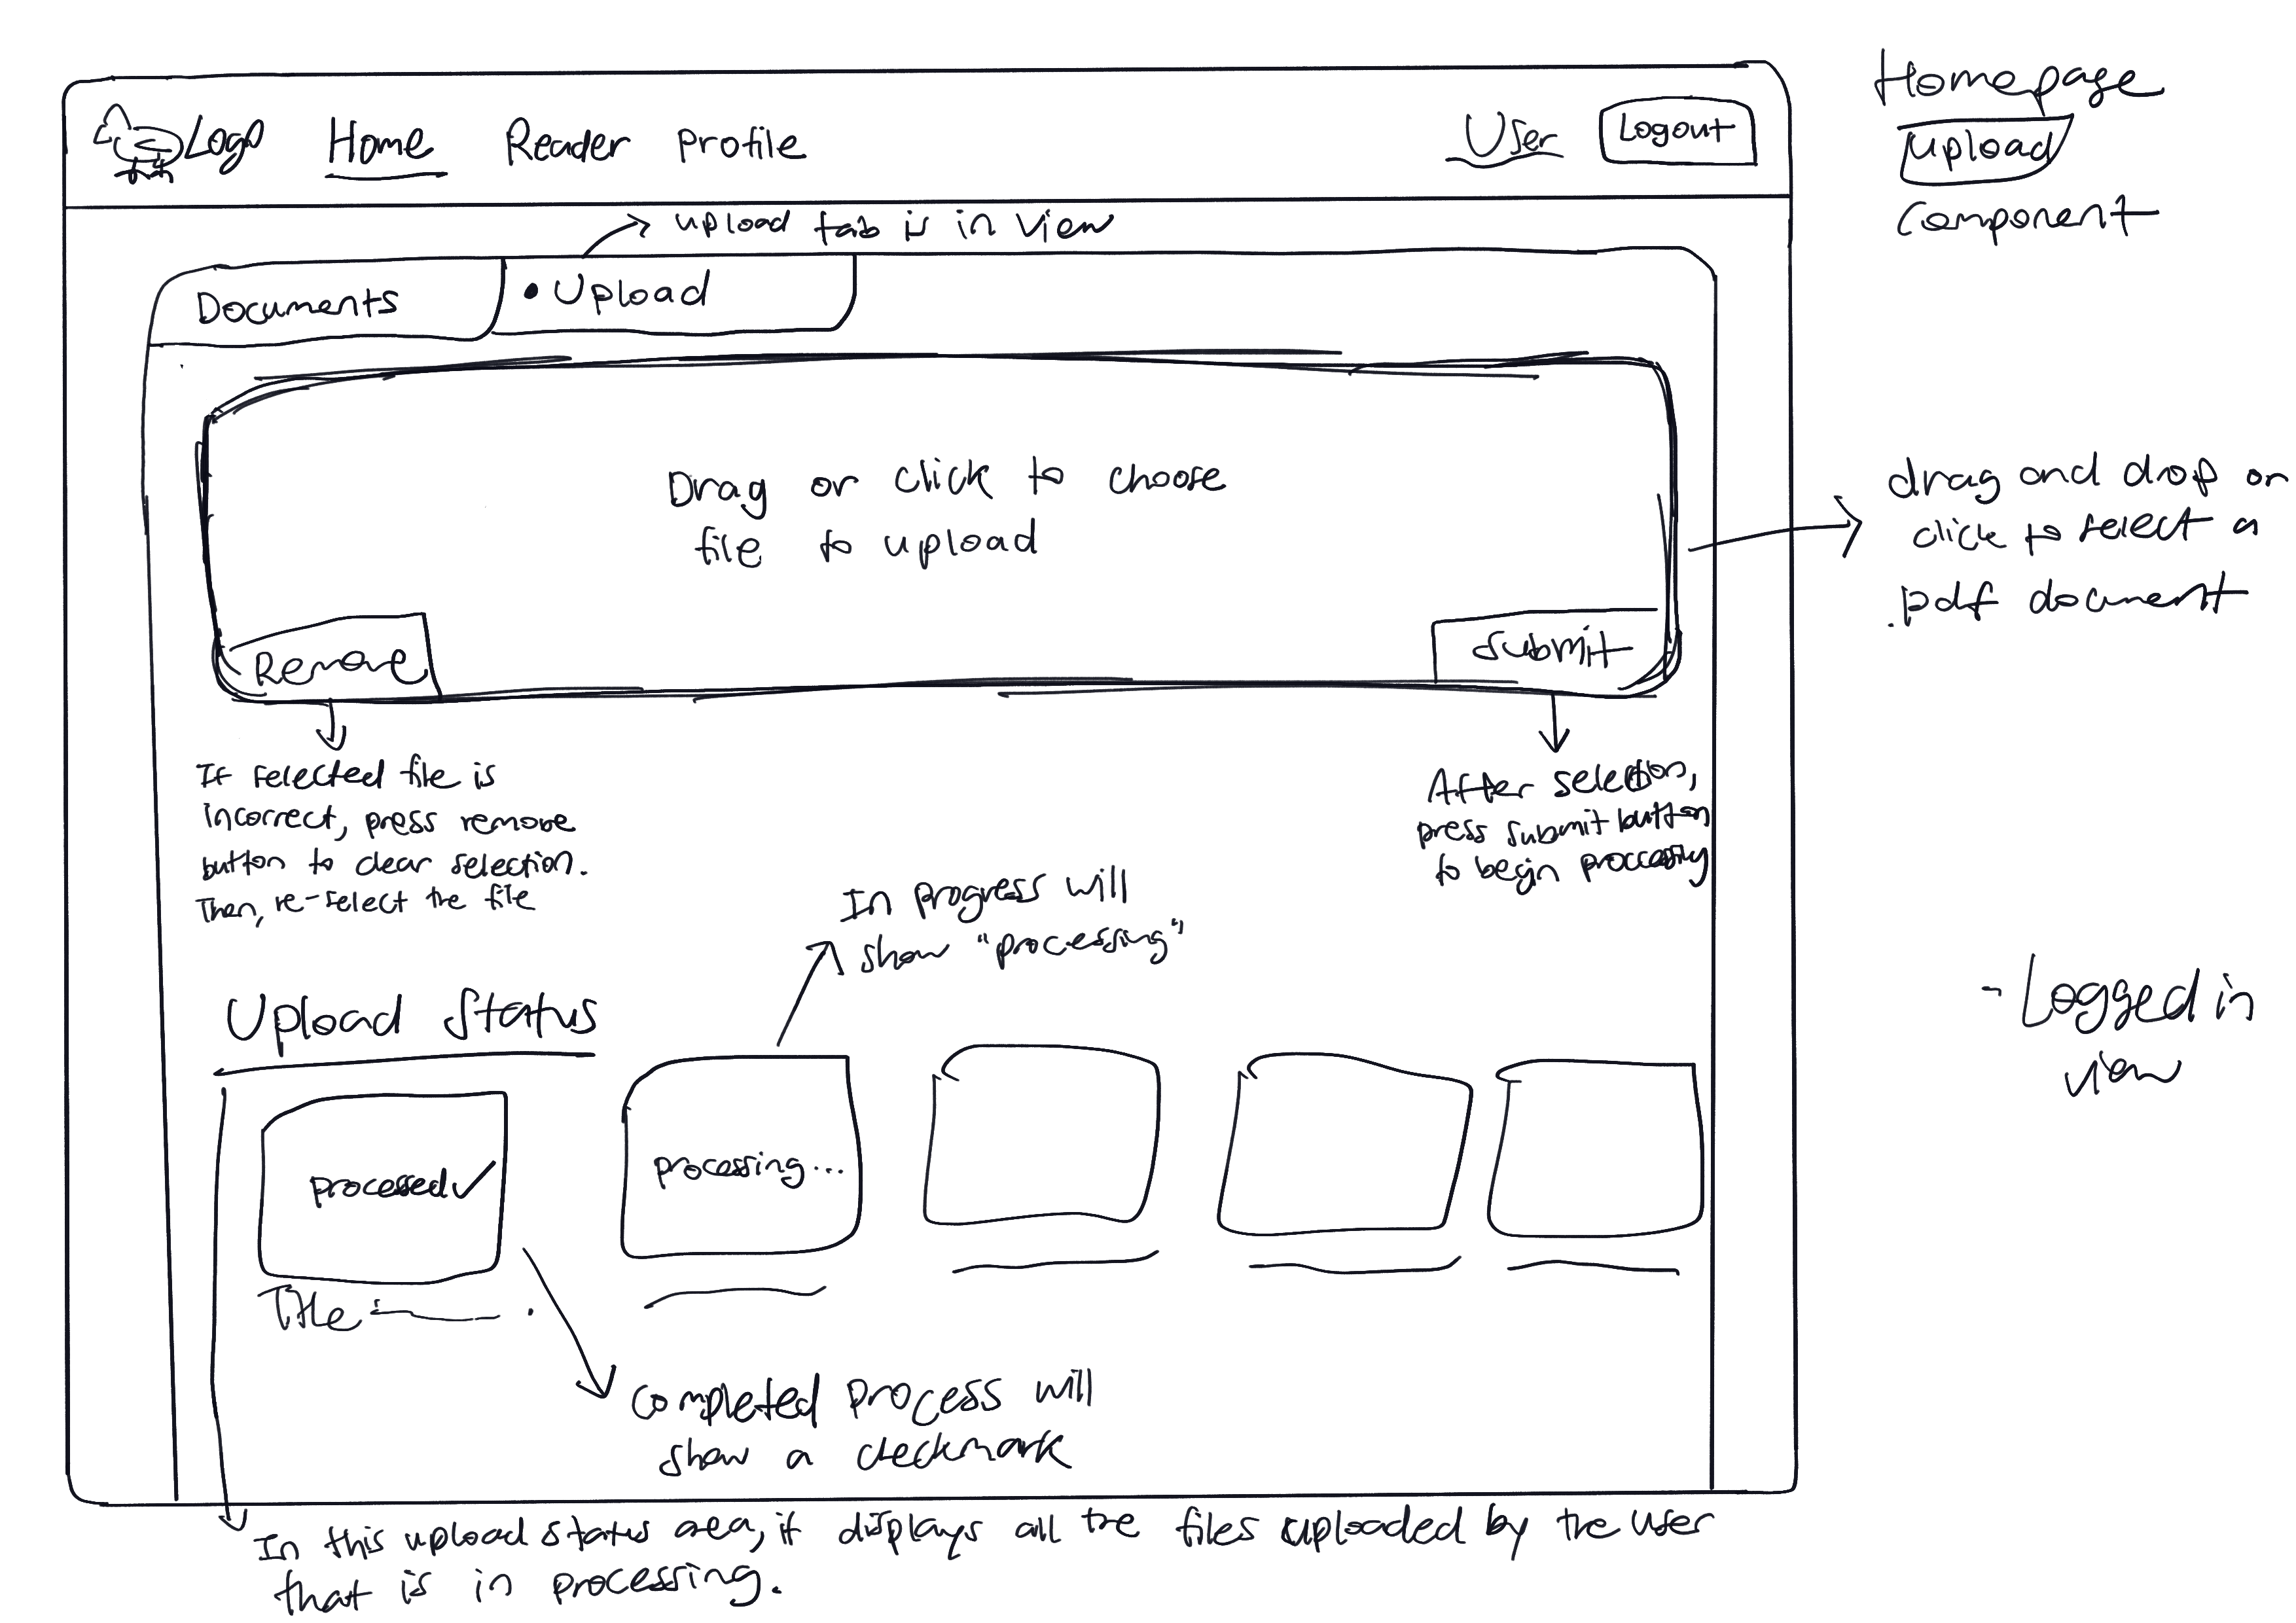
Upload tab in the Home View Page
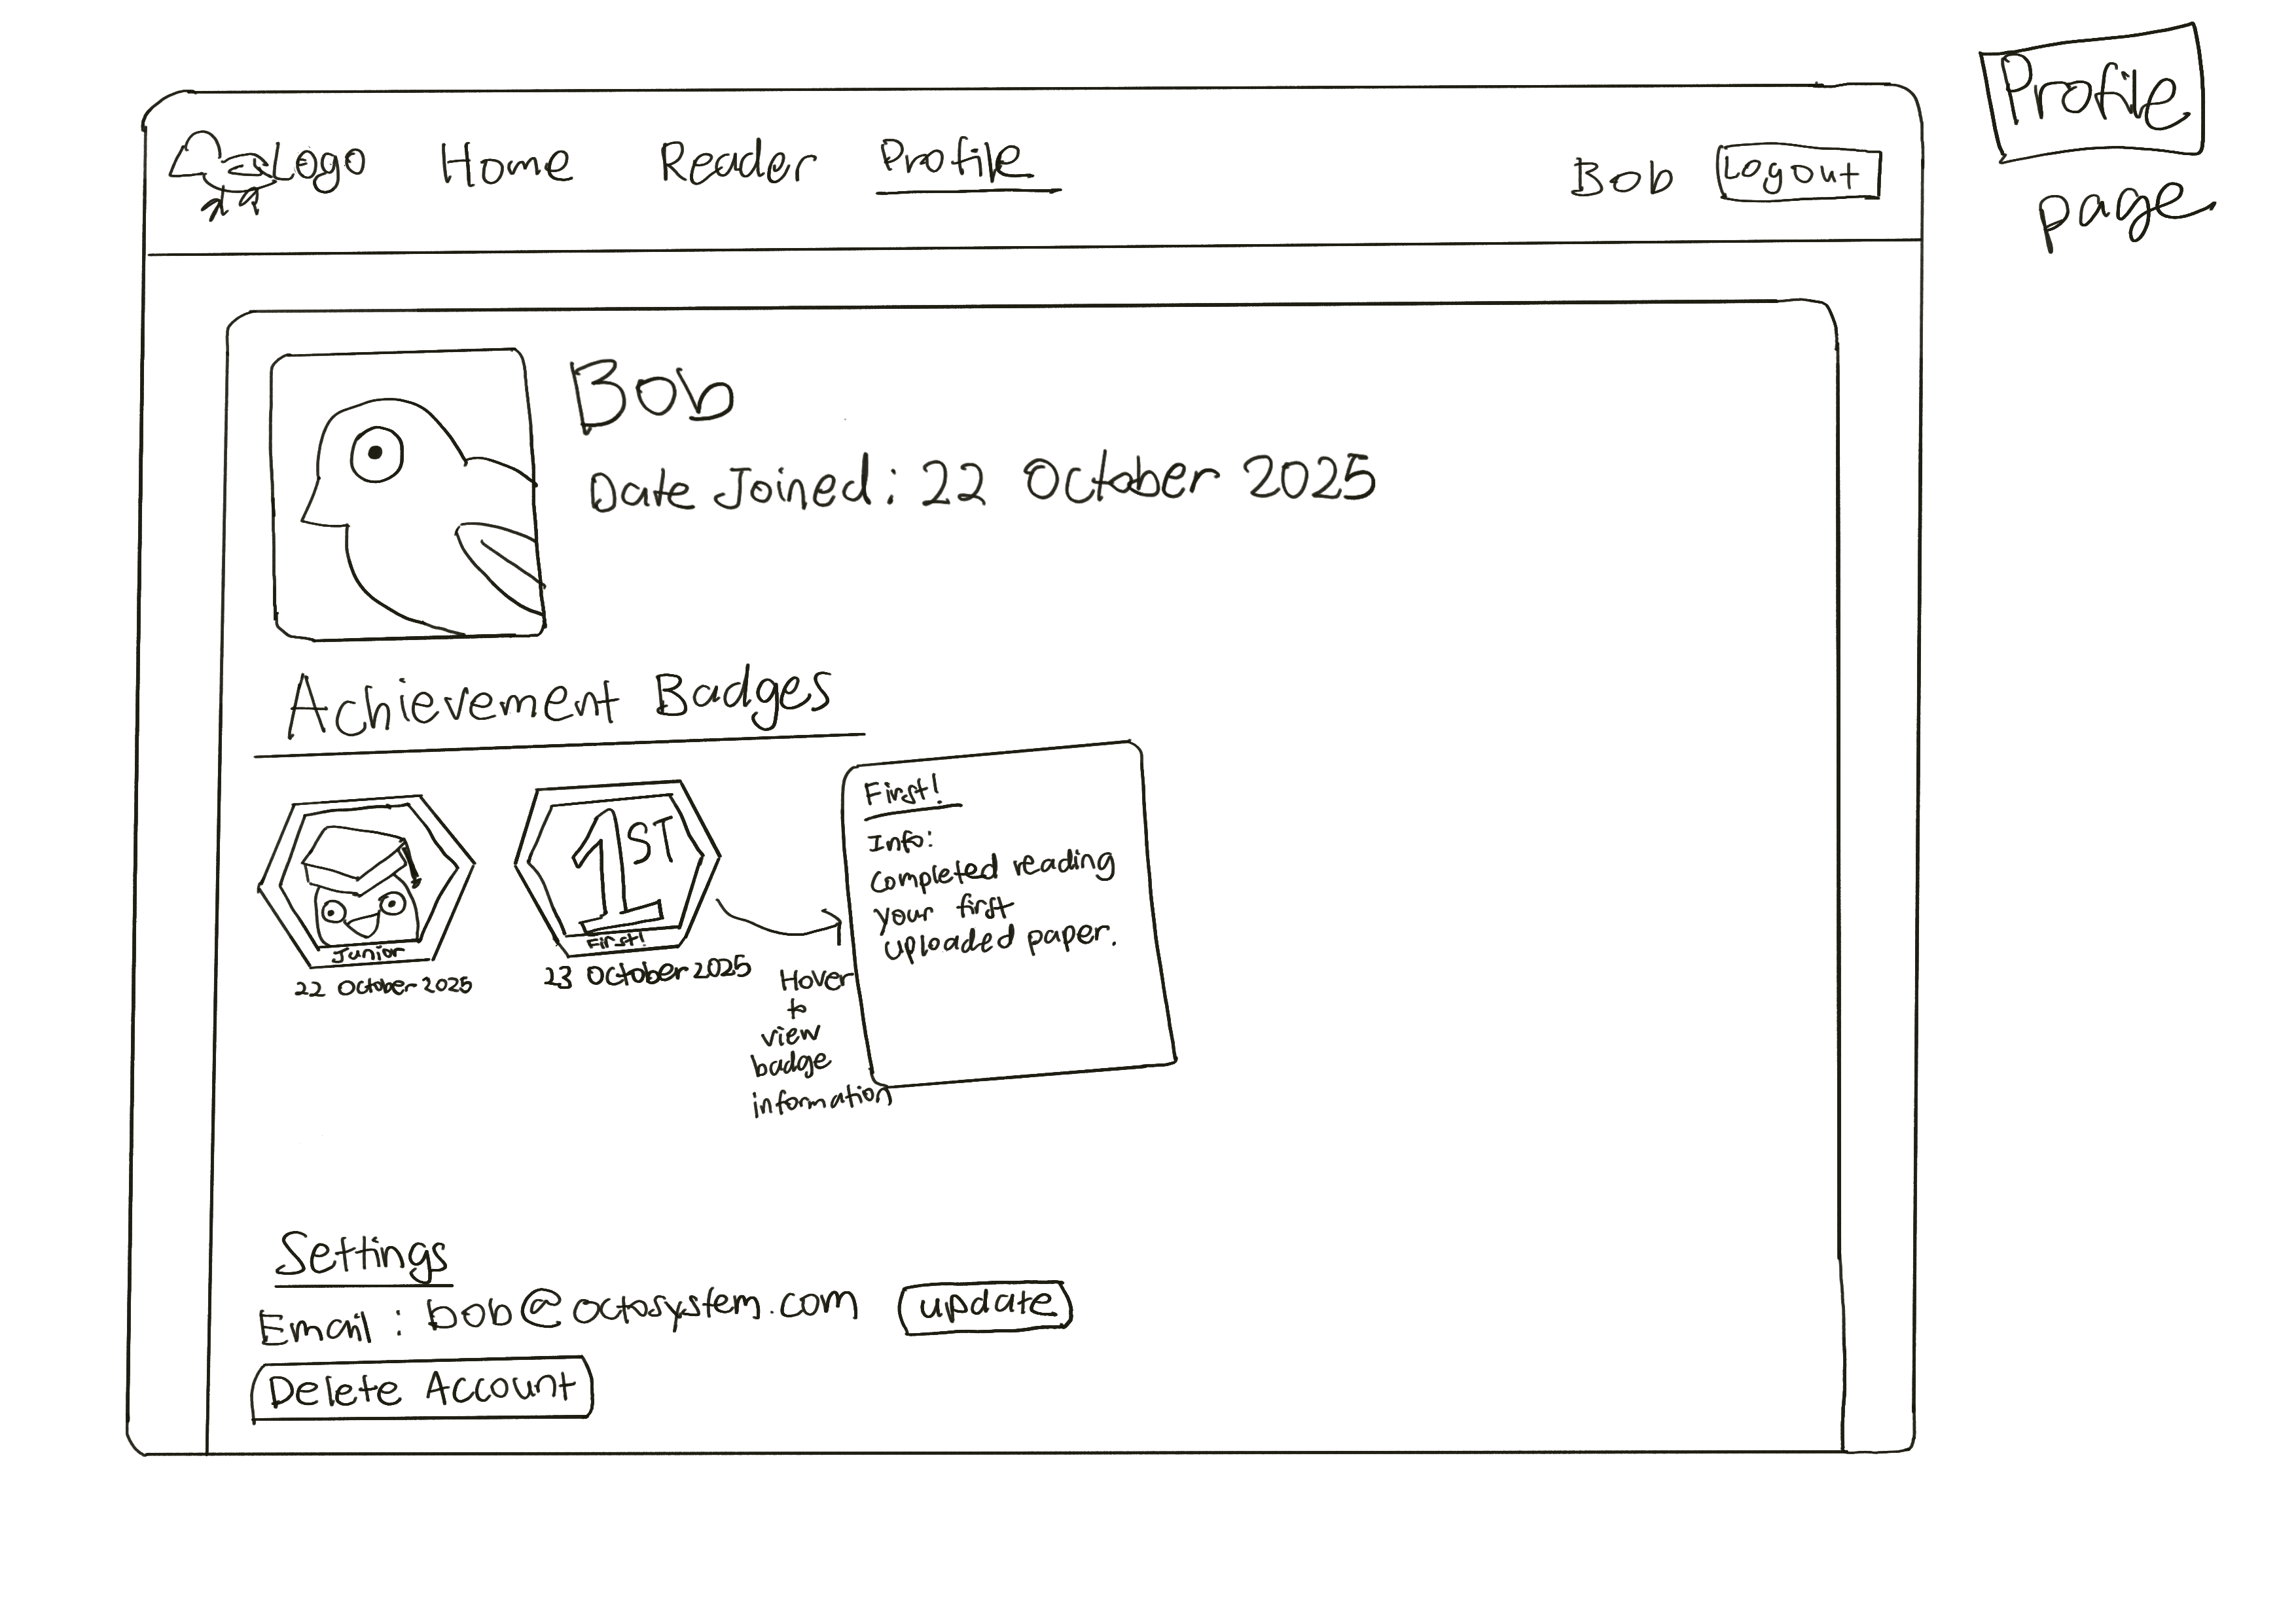
Profile Page
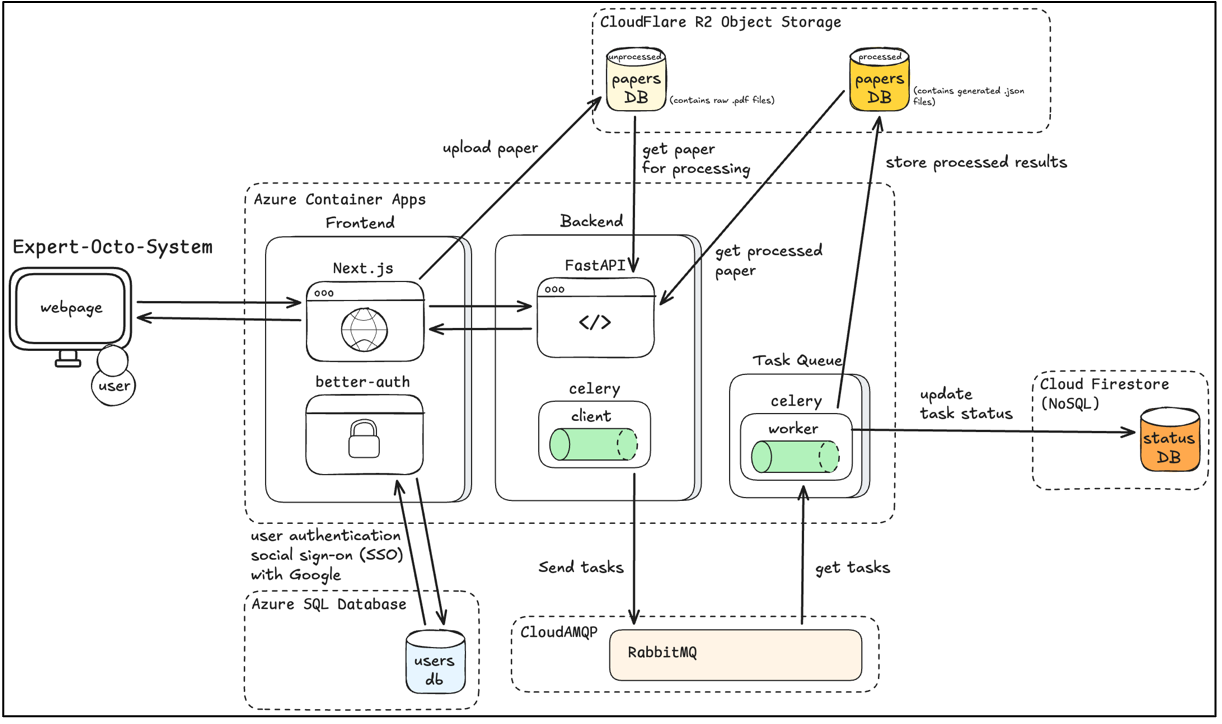
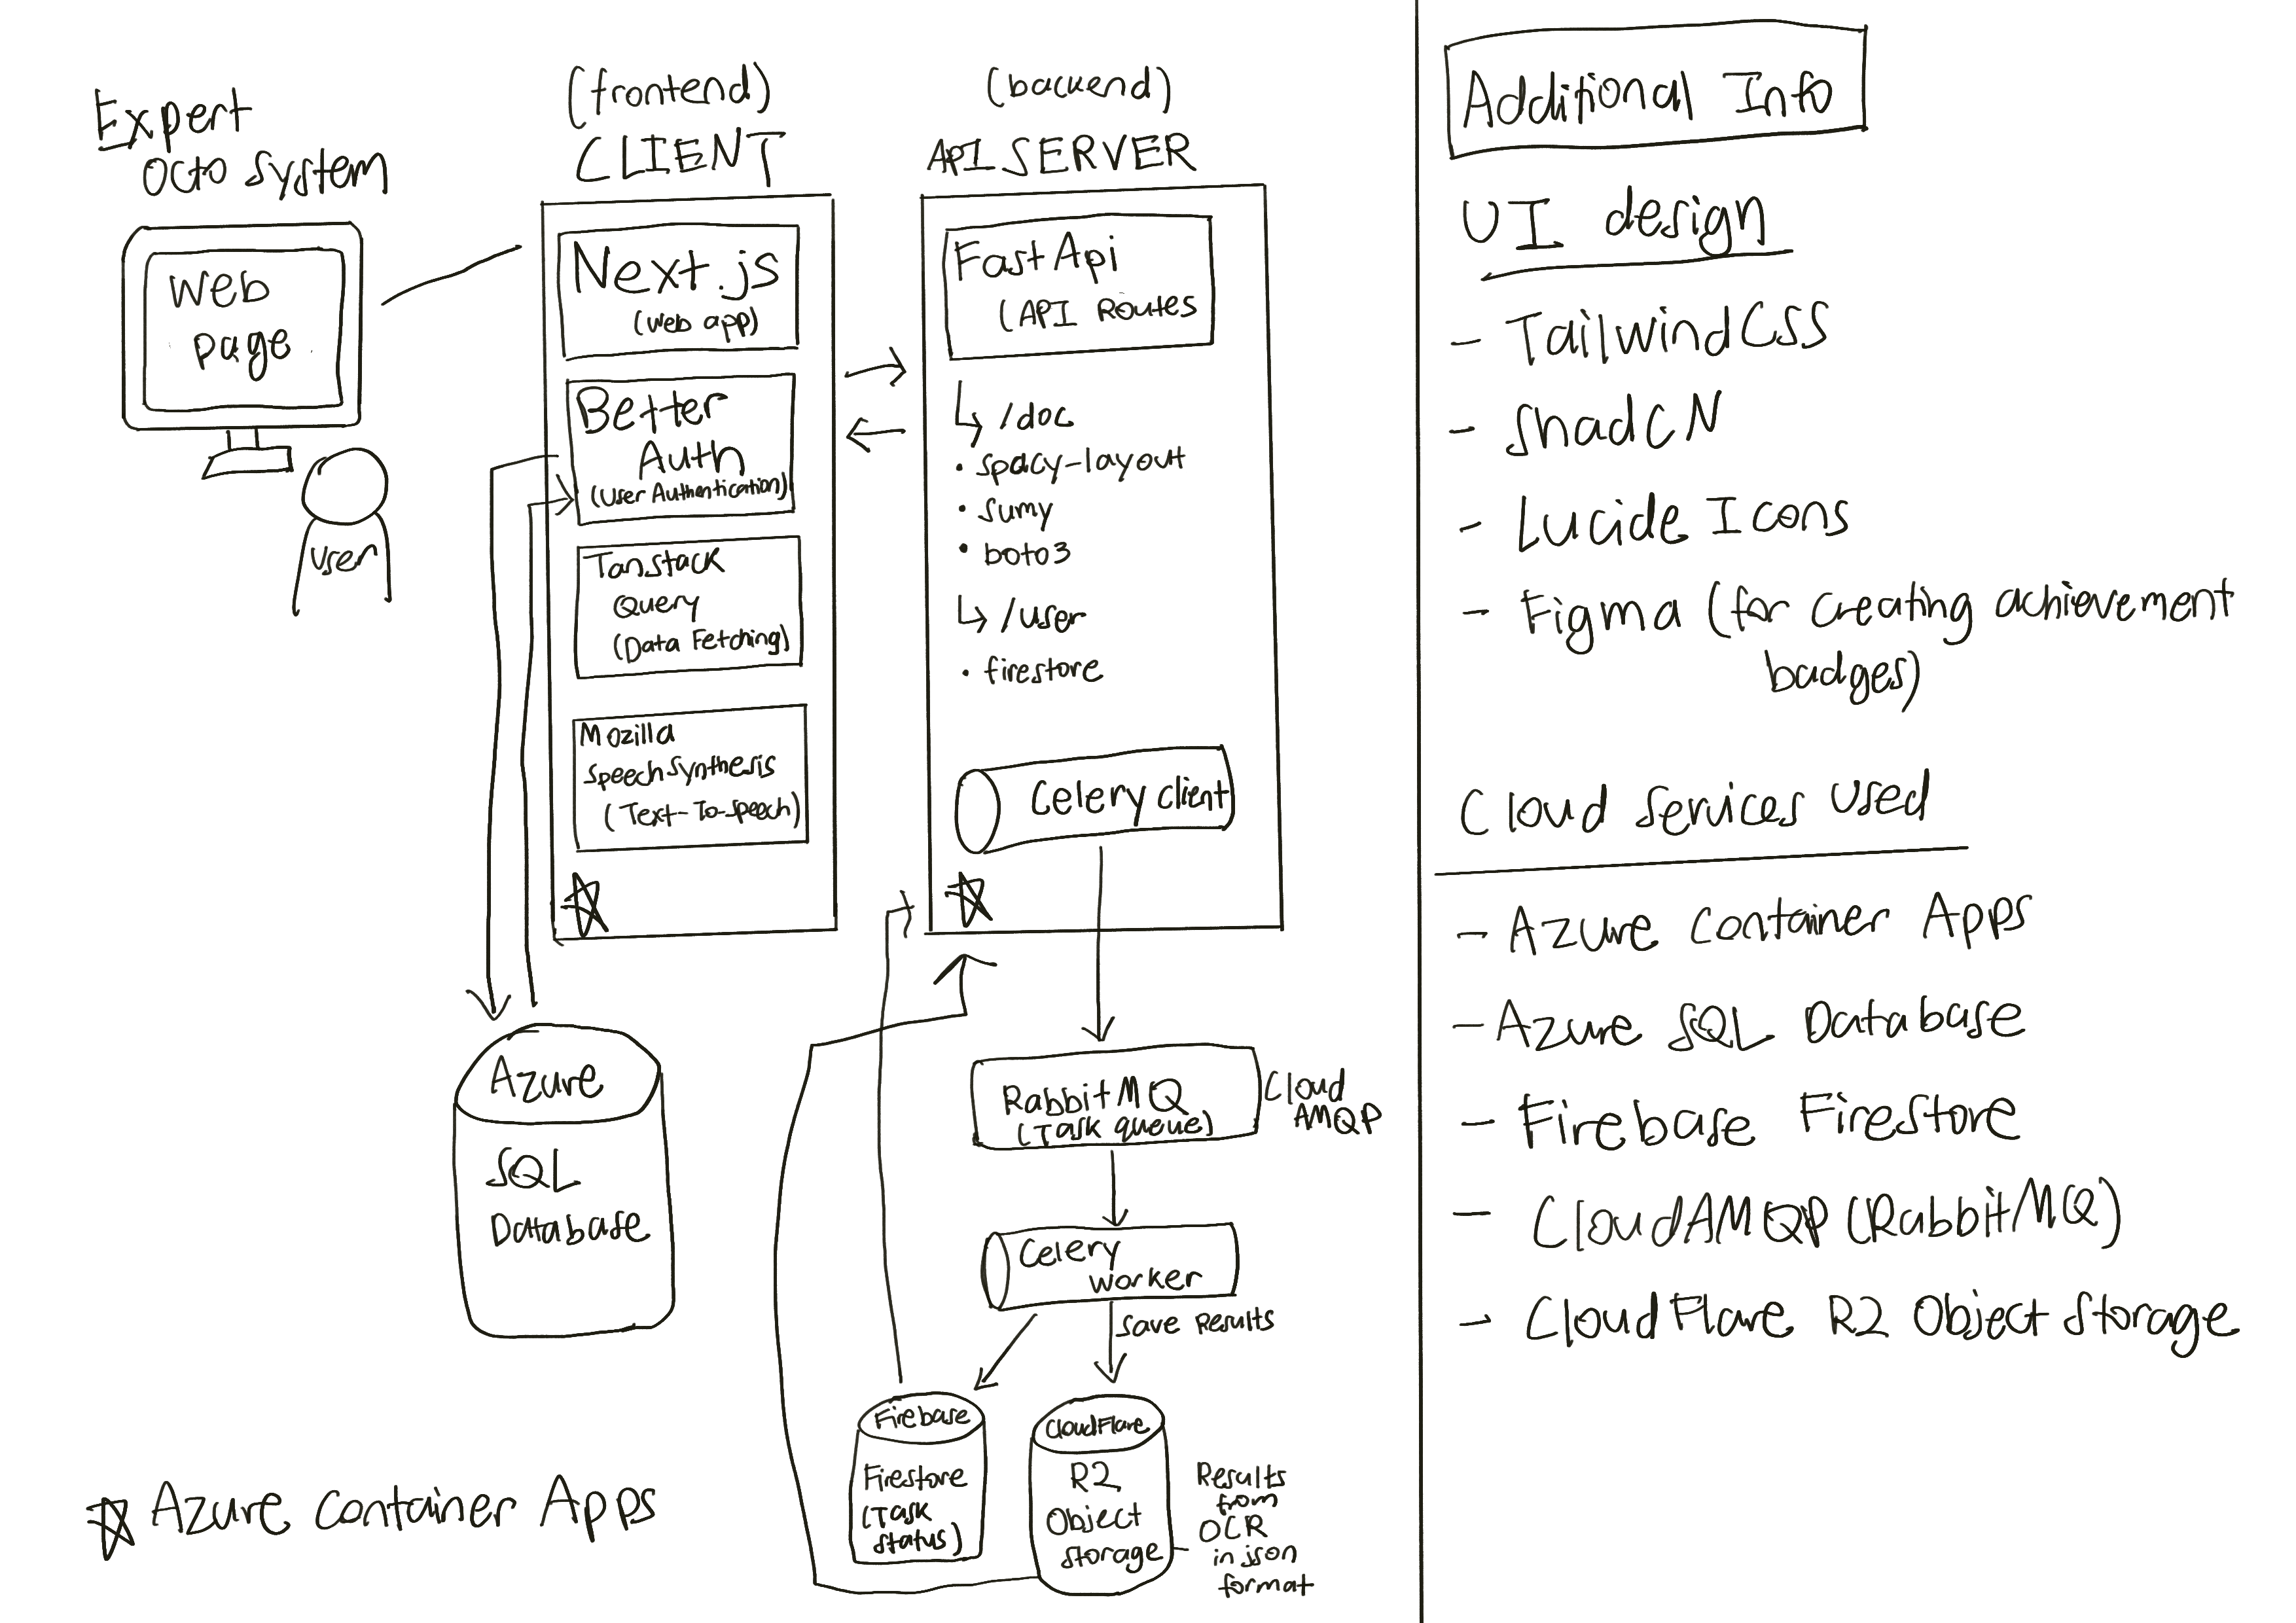
Architecture Diagram
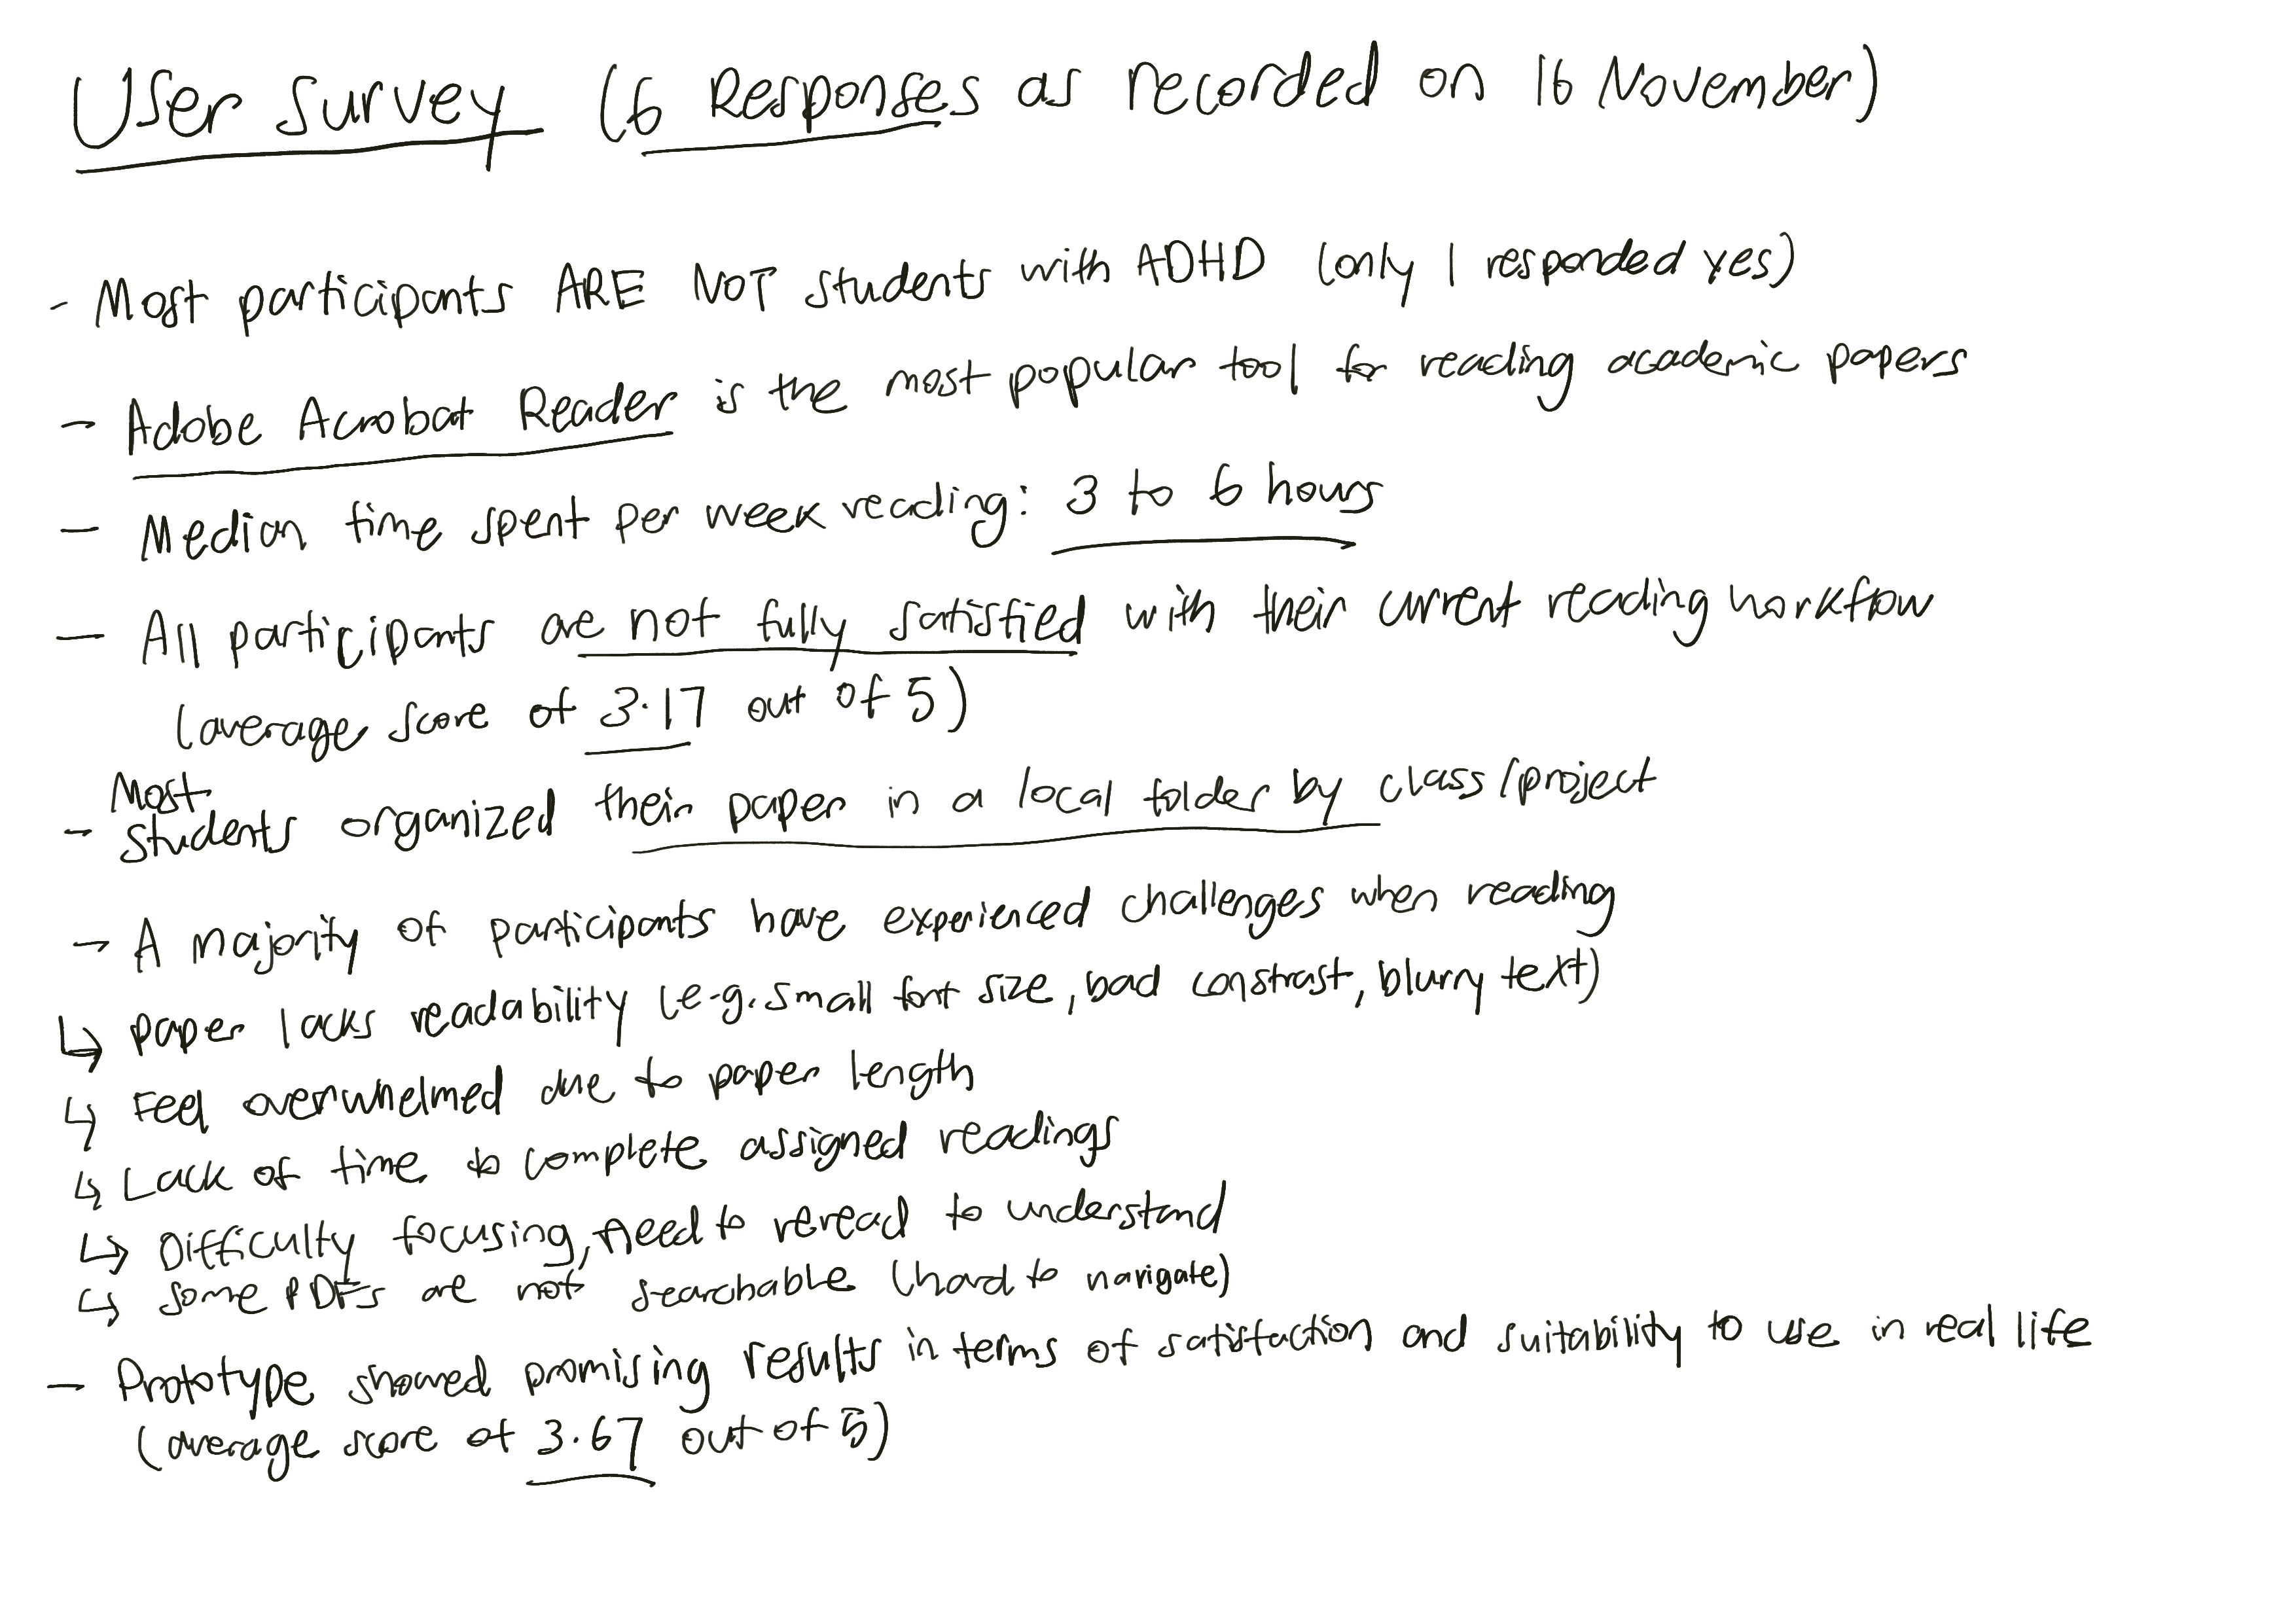
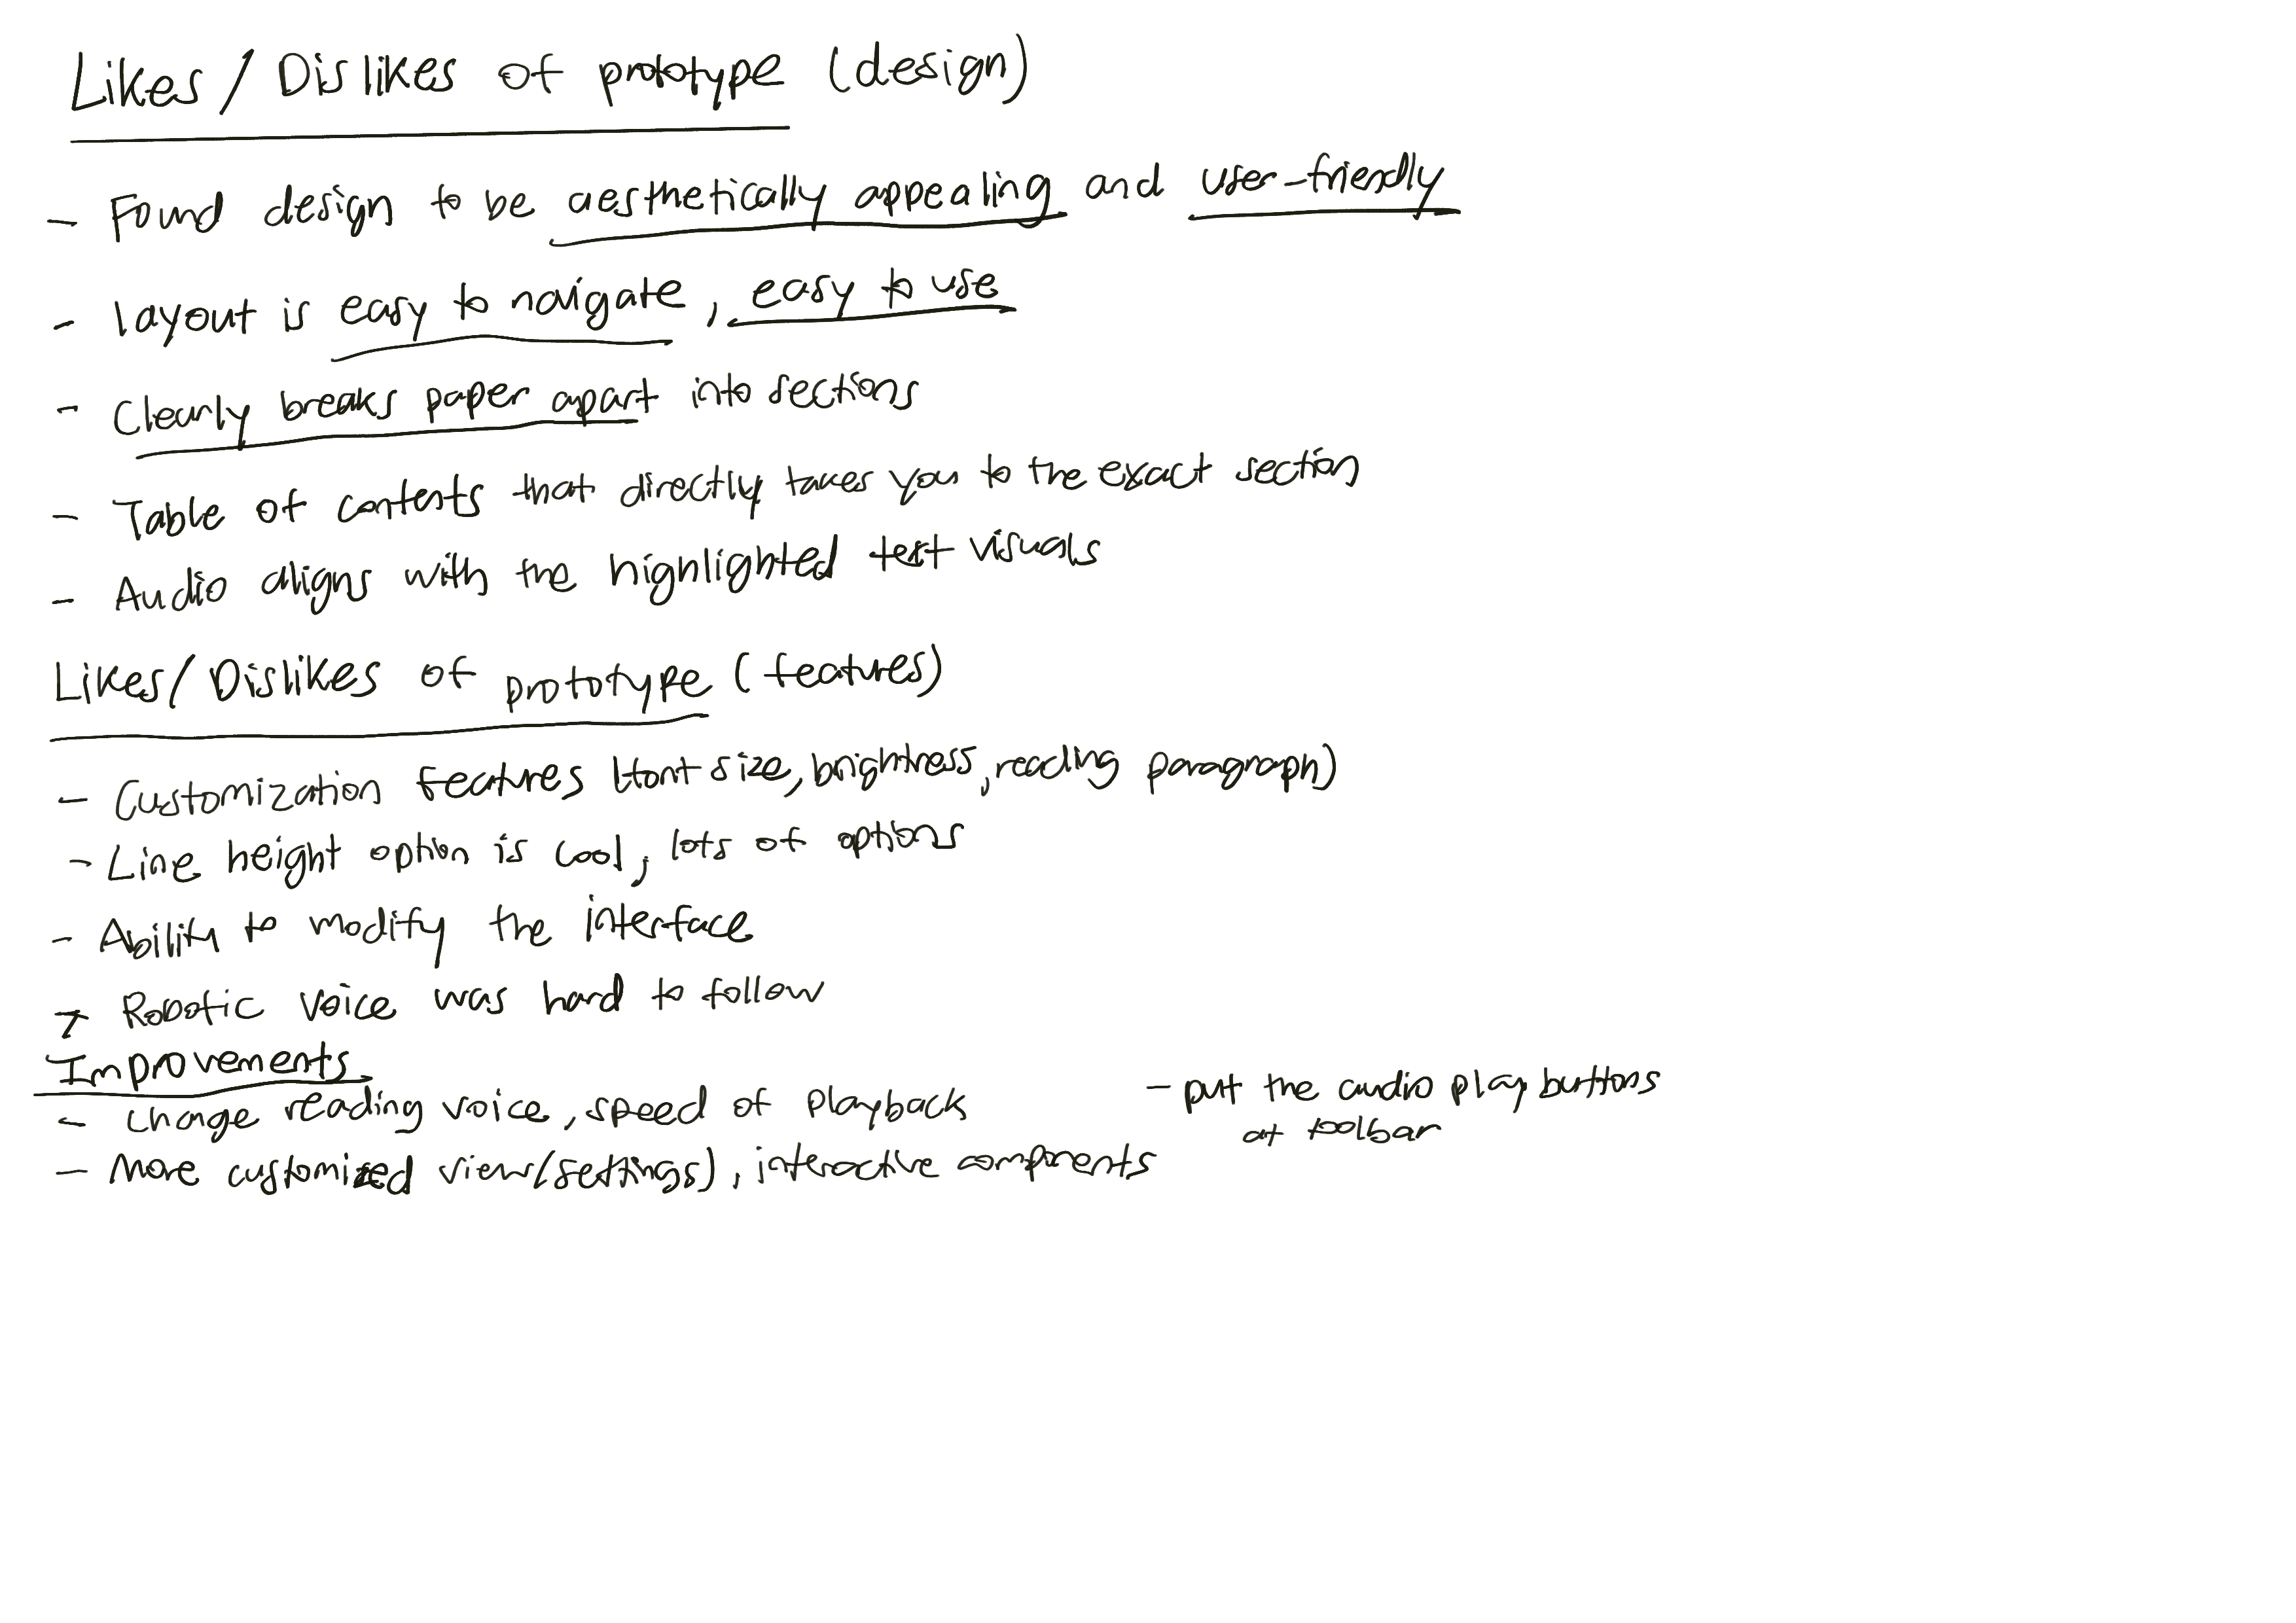
User Survey